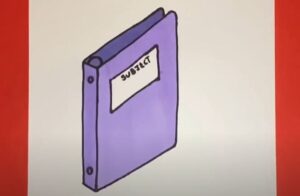
How to Draw a Binder with this how-to video and step by step drawing instructions. There are 6 easy steps to follow, children will enjoy drawing their own binder on paper.

Please see Binder drawing tutorial in the video below
You can refer to Binder simple step by step drawing guide below
Step 1. Draw the spine of the book cover
Start by drawing a vertical rectangle to form the spine of the folder.
Step 2. Form the Binder cover
Now, create two rectangles attached to the spine to add the cover.
Step 3. Add documents
Add documents inside the folder by drawing diagonal lines.
Step 4. Next Sketch the Label
Next, draw a smaller vertical rectangle to outline the label.
Step 5. Attach adhesive rings
Attach the binder rings by drawing two thin, curved shapes.
Step 6. Complete the Binder drawing
Add some color to your cardboard drawings! Use a bright red pencil to color the cover. Next, use a light gray pencil to fill in the binder rings. Use a light blue pencil to color the label on the cardboard and a white pen to add some writing to the label. Then, use a light yellow pencil to color the documents inside the folder.

