How to Draw a Beanie Hat easy with this how-to video and step-by-step drawing instructions. How to draw easy for beginners and kids
Please see the drawing tutorial in the video below
You can refer to the simple step-by-step drawing guide below
Step 1 – Draw the Outline of the Beanie Hat
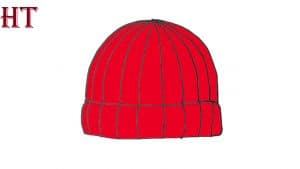
First, create an outline of the two main shapes of the hat. Start with the bottom fold and then add the top on top with a nice, smooth curve.
To make the hat look a little more like fabric, you can intentionally make your lines slightly wobbly so that its shape is a bit uneven.
Step 2 – Draw lines along the bottom
To make the hat a little more interesting, draw some lines along its bottom crease to create the look these hats usually have.
Draw lines farther apart near the middle and closer together as they’re to the sides. This will help show the curve of its shape.
Step 3 – Draw lines along the top & finish line drawing
Starting at the top ends of the line in the previous step, project another set of lines running towards the tip of the hat. You can also add some breaks in some of these lines in random places.
After drawing all the details of the beanie, you can redraw your lines with a black pen or marker. If you don’t have around, you can simply darken them with a pencil.
Whichever option you choose, make sure you’re happy with your drawing before following it up.
Step 4 – Color the hat
You can use any medium you like to color the hat (paints, markers, crayons, etc.).
In this case, the beanie will be red, but you can go with anything else. There really isn’t much else to it. Just paint the entire hat with a solid color and you’re done.
