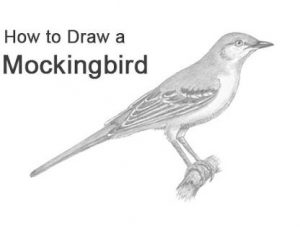
Mockingbird Drawing easy with this how-to video and step-by-step drawing instructions. How to draw a bird for beginners and all.

Please see the drawing tutorial in the video below
You can refer to the simple step-by-step drawing guide below
Step 1
Draw a small circle for the head and then draw another shape that looks like an egg for the body. Then you will draw the entire outline of the mockingbird’s body as you see here. This includes the tail and legs.
Step 2
Start by outlining the shape of the beak as seen here, and then incorporate that same lining for the head, neck, and chest.
Step 3
Draw the shape of a visible wind, then add detailed lines of the feather shape until you reach the end of the wing. Then you’ll draw the lining for the belly, thighs, and legs.
Step 4
Oh it’s very fast. Now you are ready to complete your newly painted bird. Draw the eyes in detail, add some nostrils, and then add feathers to the wings. Outline the entire tail and make sure to show the layers of tail feathers. Once done, you can outline the lower back of the bird’s body like so. Finally, draw the stretched foot. Erase the lines and shapes you drew in step one.
Step 5
You have now finished drawing a mockingbird. How good and easy this guide was. I hope you’ll join me for another free drawing lesson coming back to life soon.


