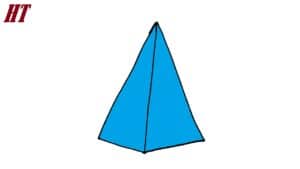
How to Draw a 3D Pyramid with this how to video and step by step drawing instructions. This guide is simple and is specially designed for beginner artists.

Please see 3D Pyramid drawing tutorial in the video below
I warn you a new lesson will be very helpful for you, and now you will learn how to draw 3d pyramid step by step. The lesson consists of only four steps, and it will be a great exercise for your creativity.
Drawing simple geometric shapes promotes the development of spatial imagination and this quality will certainly come in handy in the future when you want to draw more complex objects. All artists at the beginning of their careers learn to draw simple geometric shapes, such as a cube, ball, cylinder, or pyramid.
A pyramid is a polyhedron in which one face is a polygon and the other faces are triangles with a common vertex. In this tutorial, you only see two faces. For coloring, you should use two different shades so that one is light and the other is dark. Thus, you can display the volume of this geometry and make it more realistic.
3D Pyramid Drawing Step by Step
Step 1. Draw an edge of the pyramid.
Draw a slightly inclined vertical line.
Step 2. Add the side panels.
On the edges, add two even line segments that converge at a vertex.
Step 3. Draw the bottom of the pyramid.
At the bottom, draw straight seams between the sides of the pyramid.
Step 4. Color the 3D pyramid.
Use two shades of blue or light gray.
3D pyramid is ready! Now you are convinced that drawing 3D pyramids is easy and fun. Write your opinion about this lesson and suggest ideas for next drawing lessons. Write down other geometric shapes that you would like to learn how to draw and I will take your wishes into account when compiling new lessons.


