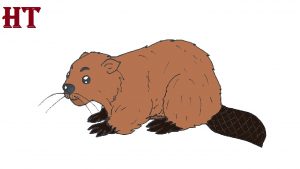
Beaver Drawing Easy with this how-to video and step-by-step drawing instructions. Easy animals to draw for beginners and kids.

Please see the drawing tutorial in the video below
You can refer to the simple step-by-step drawing guide below
Step 1
Start by drawing three overlapping circles. Note that one circle is significantly larger than the others. This will form the head and body of the animated beaver.
Step 2
Beaver head details. Use a curve to form the ears and additional curves to create the top of the head, forehead, snout, and neck. Surrounds an irregular circular shape to indicate the nose.
Step 3
Line the front legs. Use curves and short that meet at jagged points to outline the edges of the legs. Cover the foot and toe using curves that meet in points, denoting claws.
Step 4
Draw a curve connecting the circles at the top, outlining the beaver’s back.
Step 5
Draw the hind legs. Again, use short lines that meet at jagged points to outline the sides of the hairs on the legs. Then outline the foot using curves, with each toe ending with a pointed tip. Note the short lines that indicate flexion of the foot.
Step 6
Erase the guide lines left by the original circles. Complete the beaver’s far head and ears using the curves.
Step 7
Stretch two long curves from the back of the beaver’s hind legs and allow them to meet at a gentle, rounded point. This forms the beaver’s tail. Text the tail using slashes – perpendicular curves form a checkerboard pattern on the tail.
Step 8
Detail of the beaver’s face. Add curves, connecting to denote hairy cheeks. For the eyes, draw a circle in a circle and shade between them. Paste a curve over each eye to indicate the eyebrows. Elongate long curves from each side of the mouth to form a beard.
Step 9
Shade the nose and detail the inside of the ears. Use curves to outline the far feet. Finally, texture the beaver’s fur with short lines. Color your beaver. They are usually brown in color.


