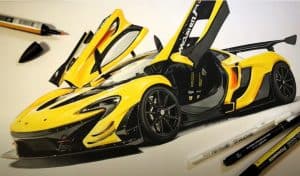
How to Draw a McLaren P1 GTR easy with this how-to video and step-by-step drawing instructions. Car Drawing tutorial for beginners and everyone.

Please see the drawing tutorial in the video below
You can refer to the simple step-by-step drawing guide below
Step 1
First of all, we need to draw the outlines of our awesome supercar body. Outline the contours as shown in our example using bright, almost invisible lines.
Step 2
Outlining the headlights is very unusual, passing through the bumper. Next, outline the open doors that protrude like gull wings and the contours of the wheel and wheel arches.
Step 3
In front of the car outlines the contours of the bumper. On the doors draw windows and mirrors to see behind. Next, outline a large spoiler and outline the contours.
Step 4
Now we need to start drawing the final details. With the help of clear and smooth lines that will highlight the headlights and the contours of the unusual bumper.
Step 5
Now move a little higher and draw out the contours of our sports car’s intricate hood.
Step 6
Now move to the gates. Draw them as shown in our example. Try to repeat all the complicated lines like in our example.
Step 7
In this step, there will be more complex lines. Here we will need to accurately draw all the details of the rear of the car.
Step 8
Time to draw the wheel and rim. Try to make the rim of the wheel as round as possible and make the rim big and bulky.
Step 9
Now we have reached the final step in our drawing lesson on how to draw a McLaren P1 GTR. In this step we need to add some glare using long lines and dense shadows.
It’s a very difficult drawing lesson in that there are lots of very different details and lines. But if your McLaren P1 GTR drawing looks as realistic as it is in our example, all efforts have not been in vain. By the way, don’t forget that our “Automobiles” portfolio is full of lessons learned about the most different cars of different companies and for different purposes.


