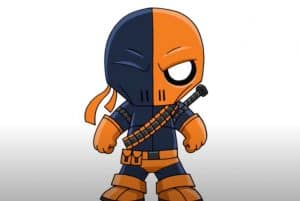
How to Draw Deadshot easy with this how-to video and step-by-step drawing instructions. Easy drawing tutorial for beginners and kids.

Please see the drawing tutorial in the video below
You can refer to the simple step-by-step drawing guide below
Step 1
First, grab a pencil in hand and outline the contours of our deadshot chibi’s rounded end. In the first step also outline two lines on the surface of the head.
Step 2
Now let’s treat Deadshot’s body, sketching it out as a simple geometry. Next, in the same step, we outline the arms and legs.
Step 3
Let’s start solving the details. And traditionally we start by drawing eyes. Notice that the left eye is closing with a very cool and unusual scene.
Step 4
With the help of smooth lines draw out the contours of the head and the details of the mask. Don’t forget to delete all the unnecessary guidelines, as shown in our example.
Step 5
And this step will not be so simple. Here we will need to draw the details of the body and arm. Draw these parts of the body, paying particular attention to the details, try to duplicate them like in our example.
Step 6
It is also quite a difficult step. Use the clear and dark lines to draw the outlines of the legs, also don’t forget to draw the details accurately, as shown in the example below.
As we said, this lesson is very simple. If you’ve dealt with this lesson without difficulty, visit our other drawing lessons from the “Anime” and “Comics” sections to continue learning how to draw. Also, be sure to let us know your opinion on this drawing lesson so we know if it will be helpful and interesting for our readers.


