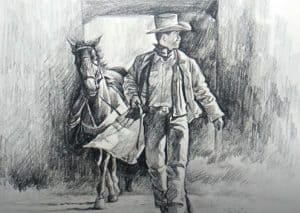
How to Draw a Cowboy easy with this how-to video and step-by-step drawing instructions. Pencil drawing tutorial for beginners and everyone.

Please see the drawing tutorial in the video below
You can refer to the simple step-by-step drawing guide below
Step 1
First of all, let’s sketch the contours of the cowboy’s oval head, the neckline, into the spine. Next, we draw a chest and a pelvis. With the help of simple lines, outline the arms and legs. As you can understand, everyone is drawn equally, and this drawing lesson is no exception.
Step 2
Now let’s draw two simple lines that intersect in the center of the face, slightly raised. After these lines we need to outline the neck, move into the body. In the form of a triangle, we outline the cowboy’s pelvis, and with the help of the cylinder, we outline the arms and legs. We conclude this step by outlining the hands and feet.
Step 3
So now is the time to sketch out the most basic details. Here we will use the two intersecting lines of the face, with the help of which we will outline the contours of the face. Then we sketch a famous cowboy hat. We move a little lower and outline the contours of our jacket and pistol on our cowboy hands.
Step 4
Starting from this step we need to start drawing the final details. Using clear lines, gently draw the eyes, nose, and mouth. Next, we need to draw the contours of the face (cheekbones and chin). Now draw the hat and long hair. By the way, you can draw a cowboy-specific mustache or sideburn.
Step 5
So let’s move on to below. Here we draw the contours of the neck. Then we carefully draw the hem of the shirt and the very wide collar of the jacket. Now we need to draw all the creases on the cowboy’s shirt and jacket. We end this step by removing all unnecessary instructions from the body.
Step 6
Quite a difficult step where we need to draw the arms. So first, draw the contours of the sleeve, taking into account all the necessary creases. Next, we draw hands, one of which holds a long cowboy revolver. Another pistol hung from a cowboy belt.
Step 7
So in this step we will draw our cowboy’s lower body. Using long and clear lines, we carefully draw the contours of the pants, also remember to draw all the creases like in the example below. In the same step, let’s draw the shoes and the bottom of the cowboy jacket.
Stpe 8
So the cowboy was almost drawn, but it didn’t look too bulky. To make it bulky, let’s add some shadows. As in previous lessons like this, we first define the source of the light. Furthermore, taking this into account, we outline the shadows with the help of dense hatching.


