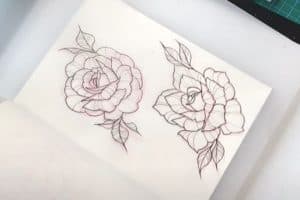
Rose Drawing Tattoo by pencil with this how-to video and step-by-step drawting instructions. How to draw a rose easy for beginners and everyone.

Please see the painting tutorial in the video below
You can refer to the simple step-by-step drawting guide below
Step 1
Start by drawing the center square of the rose, which is the bud in a tightly wrapped still.
Step 2
Next, you sketch three petals that will surround the center of the rose like that.
Step 3
We’ll add another layer of rose petals around the petals we just drew. The more layers you draw, the bigger the petals.
Step 4
Now the petals will start to fold as they get bigger. Draw three to four more rose petals as you can see here with the larger part folded.
Step 5
Create a series of petals to form a full flower. When this task is completed, you will finish drawing a rose.
Step 6
Now draw three leaves that serve as a bed for the rose. The edges should be serrated or serrated at small points.
Step 7
Identify the leaves by sketching the concave lines on the side, then bold the middle line down the center of the leaf.
Step 8
Almost done, only one more step after this step. You will draw thorns around the back of the rose. Some spikes are bigger than others, you can choose the size you want.
Step 9
And finally, draw splashes of blood, scattered fragments or what you have to add complexity to your rose tattoo design ideas. You can add a little blood dripping from the petals if you want.
Step 10
The finished idea looks like the drawing you see here. Now all that’s left is to color the flower.


