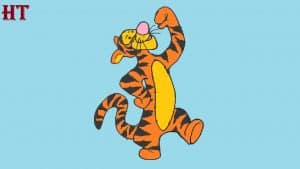
How to draw Tigger from winnie the pooh easy with this how-to video and step-by-step drawing instructions. Cartoon drawings for beginners and kids.

Please see the drawing tutorial in the video below
You can refer to the simple step-by-step drawing guide below
Step 1
Start by using overlapping curves to outline his head. Use one curve for the top of the muzzle, another for the forehead. Use “C” shaped lines to surround the ears. Draw a curve over the near ear, stretching it to form one side of the face. Then draw the inner details of both ears using short lines.
Step 2
Covers a variety of unusual shapes to form the muzzle and mouth. Start with the smallest, rounded triangle shape of the nose. Then, wrap the larger shapes around it.
Step 3
Face details. Paint a small dot for one eye, a curve for its wink. Use curves to draw eyebrows and beard. Draw small dots on the muzzle below the beard.
Step 4
Draw some small and curved triangles on Tigger’s face, some from the top of the head and some from the base of the jaw. Shade the triangles to form her strips. Then, use long and curved lines to outline the outstretched arm and hand. Hand detail with a short, curve.
Step 5
Use a series of curves to outline the arm and the other hand, again detailing the palm with a short line. Then, widen the curves under the arms to form the back and abdomen.
Step 6
Extend a curve from below the belly and fold it back over itself to form the shins and lift feet. Use the second line around the top of the leg.
Step 7
Use a series of curves to surround the Tigger’s other leg and foot.
Step 8
Use the curves to surround the model under the Tiger’s belly and pads under its feet. Elongate a curve from the hips and fold in half to form the tail.
Step 9
Draw small triangles all over the Tigger’s body – arms, legs, edges, and tail. Include a few rectangles in the tail, including the head. Shade these shapes to form the Tigger’s stripes.
Step 10
Tiger color. He is orange in color with a cream-colored belly and facial markings, and a pink-red nose.


