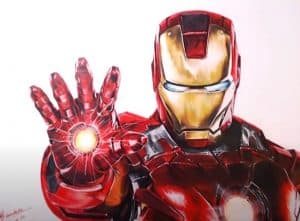
How to draw Iron Man (Tony Stark) realistic with this how-to video and step-by-step drawing instructions. Pencil drawing tutorial for beginners and everyone.

Please see the drawing tutorial in the video below
You can refer to the simple step-by-step drawing guide below
Part 1
Draw a sketch of Iron Man (Tony Stark) with a pencil, if you are not confident enough to follow the instructions in the video above. Including the following steps:
Step 1
In the first step, what you will do is draw a total of seven circles. The oval circle is for the head, the circle below the head will be his shoulder, the left circle is his arm.
Step 2
In this step, draw a line for the right arm, if you look at the shape of the arm, it is nothing more than a series of oddly shaped squares. Go down to his left arm and start sketching his body.
Step 3
Sketch the inside details that add dimension to the arm. Take your time, we have a lot of work to do!
Step 4
This step is all about filling in the holes. An easy way to draw your back is to start from the shoulder line and draw a straight line with a slight curve to the other shoulder. Do the same thing for the front of the chest.
Step 5
Details, details, and more details. That is what this step is all about. A variety of line art. The best thing to do in this step is to enlarge the image and follow it line by step. Start at the front first then right arm.
Step 6
In this step, you will complete the details by outlining the rest of the lines. Draw two almond shaped eyes and show a simple line for the mouth. After you finish with all details delete all instructions and clean
Step 7
Finish by drawing his leg, draw the outline first and then use thin line weights for individual internal details.
Part 2
The final part is the coloring of Iron Man, which requires more meticulous techniques than the sketches that determine if the drawing is realistic. Follow the instructions in the video above.


