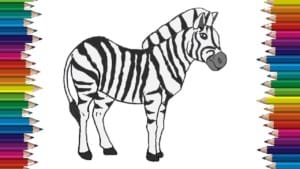
How to draw a zebra step by step easy for beginners with this how-to video and step-by-step drawing instructions. Easy animals to draw for children and everyone.

Please see the drawing tutorial in the video below
You can refer to the simple step-by-step drawing guide below
Step 1
First draw a cone-shaped snout. The bottom has a small bump midway and longer than the top line.
Step 2
Continue a short line starting at the end of the top line. Add a triangular ear at the top of the head. Behind the ears draw a curve for the rest of the head.
Step 3
Continue adding a long curve to your back. It curled down the middle of the back, curled up and then down again at the buttocks. Draw a shorter line in front to make the neck.
Step 4
Starting from the bottom of the neckline draw long thin forelimbs. Do not forget the nails at the bottom. Have a small dent or hit the heel. Draw the line up. Then draw the belly, bending it up close to the end of the posterior line.
Step 5
From the back of the belly line draw a diagonal line to start the hind leg. Then draw a straight line down the nail. Do not forget about the little indentation on your heels. Draw another line straight up, creating a thin hind legs. Continue to draw a curve towards the butt.
Step 6
Add another leg immediately behind the first leg. It should also be straight. In front of the hind leg is another leg. The top part is a diagonal line and the bottom part is straight down. Finally, add mane on the top of the back line and tail. Add the black markings on the face, ltreen zebra body.


