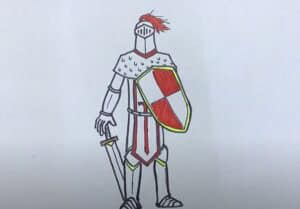
How to Draw a Crusader Knight with this how-to video and step-by-step drawing instructions. Learn to draw for beginners and everyone.

Please see Crusader Knight drawing tutorial in the video below
Crusader Knight Drawing Step by Step
Step 1
First, draw a helmet, unlike the helmet in the lesson on how to draw a helmet, it will be angular and not round (Actually, the helmet is called a helmet. This amazing looks like a bucket).
Step 2
Draw a characteristic rectangular hole for the eyes and metal bands on the helmet. You can also draw breathing holes in the mouth area.
Step 3
Now you need to draw the body. As you can see, it looks like a rounded rectangle.
Step 4
Outline the crusader’s only visible shield and right arm (Left arm is hidden behind the shield).
Step 5
Draw the legs of our crusaders, again we do it just like in the lesson on knights.
Step 6
It seems like too many lines, but it’s not. We just need to outline the cape, a sword, and a piece of clothing that covers the upper part of the leg.
Step 7
Remove all the guides from the drawing and you will get such a cool cartoon warrior!
Step 8
We just have to draw our crusaders. In fact, there were many different orders of the Crusaders and each of them had a different style and color of clothing.
If your crusader doesn’t look like me at all, don’t worry, that’s even better because I want to give you knowledge of drawing and every artist has their own unique drawing style . And of course, the traditional shortened version of the current drawing lesson, collected from all the steps.
You can see more drawing:


