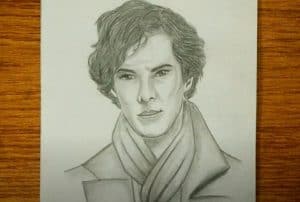
How to draw Sherlock Holmes easy with this how-to video and step-by-step drawing instructions. Celebryti drawings for beginners and everyone.

Please see the drawing tutorial in the video below
You can refer to the simple step-by-step drawing guide below
Step 1
The first step is to sketch the skeleton of our character. The first step is to draw the head, which looks like an oval. By drawing a simple line create the spine. This length will be equivalent to the height of the two ends.
Draw legs and arms. The height of the legs is equal to the height of the spine. Create lines that define the symmetry of the face. The vertical line can help us figure out where the center point of the face is. From the center draw horizontal lines that will allow us to draw the eyes.
Step 2
Let’s put some meat on the stick. With a large cylinder, traces the human body. Using the long cylinders, draw the legs and arms. It is clear that the pelvis is shaped like a triangle. The joints appear like circles.
Step 3
We started working on the fundamentals of Sherlock. With clear and bold lines, draw a border for the head. After this process, remove all unnecessary lines from the face.
Step 4
In this next step we will draw the hair. You might recognize Sherlock’s famous hairstyle. His hairstyle stays the same no matter how he sleeps.
Step 5
Sherlock played by Benedict Cumberbatch looks a bit different from the traditional Sherlock image. Sherlock is the new Sherlock that includes several accessories. The most famous accessory is an afghan. This way we will draw a long scarf to wrap around the neck.
Step 6
We will continue our lesson where we show the process of drawing Sherlock (Benedict Cumberbatch). We’ll start by studying the specifics that make up the figure. Draw your outline on vests and jackets. Draw the folds using the help of short length lines.
Step 7
In this stage we will draw the sleeves for the jacket. You will notice some creases on the distal part of the sleeve. These folds look like short horizontal or oblique lines.
Step 8
Then focus on the lower body. Draw the outline of the shoes and pants. Erase the guides, then create the folds.
Step 9
The drawing tutorial is almost done and we’ll just need to create some shadows. By using bloom light, we can create shadows in areas where the light cannot reach the ground.
Please share this drawing tutorial (if you like it) with your acquaintances. Also, don’t forget to follow our social media accounts and share your feedback in the comments section below this article.


