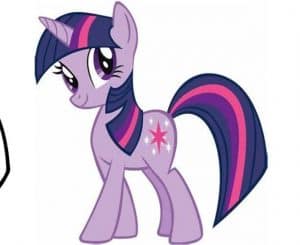
Twilight Sparkle Drawing easy with this how-to video and step-by-step drawing instructions. How to draw My Little Pony for beginners and kids.

Please see the drawing tutorial in the video below
You can refer to the simple step-by-step drawing guide below
Step 1
Another horse lesson means this will start the same way. Draw a circle for the head, and then create an egg shape for the body. Add a face guide and you’re done.
Step 2
Her straight stiff mane is a little different from what other ponies wear for a style, but then it makes her look great. Draw a bowl like shape and straight cut shape. Draw at the first ear and the back of the neck.
Step 3
Draw the unicorn horn, and then draw the shape of the face. The face is in 3/4 view which means you will also need to draw the left eye but not fully. Draw the bridge of the nose as well as the muzzle. Then do the lining for the original form of the eyes.
Step 4
The next thing we’re going to do is draw the shape of her eyes, and then color in some pupils. Add lashes to the top and bottom of her eyes, then draw stripes on her horns, and add some detail at the ears. Add her nose, and then her mouth.
Step 5
Draw the front of the neck and then the chest. You will also need to draw the first of the four pins.
Step 6
Outline the rest of the rear end of the pony’s body and then begin to form the hind legs. Draw the remaining front leg and then continue to step seven.
Step 7
Finish drawing the hind legs as you see here and then draw her very aligned tail resting high like an arch.
Step 8
Finish drawing the mane close to the neck, then draw stripes or strands on the mane and tail. Finally, draw a six-pointed star and some smaller stars in the middle. Erase the lines and shapes that you drew in step one.
Step 9
This is what your new drawing should look like and remember this is the last pony of the day. I hope you enjoyed this tutorial on how to draw Twilight Sparkle.


