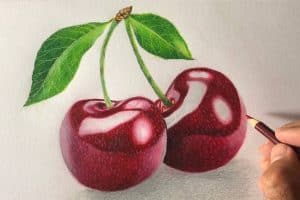
Cherry Fruit Drawing by Pencil with this how-to video and step-by-step drawing instructions. How to draw fruits for beginners and everyone.

Please see the drawing tutorial in the video below
If your kids love drawing fruit and drawing vegetables, I have a drawing of cherries for kids. Cherries are the healthiest superfood that exists. They have a wonderful sweet and sour taste with amazing health benefits and are very nutritious with a high dose of antioxidants, fiber, vitamins and minerals. Cherries are useful in treating many diseases such as gout and inflammation. I will tell you how to draw a cherry drawing. This drawing will help your child learn how to draw a cherry and show its nutritional value. It will double the fun if you teach your kids how to draw cherries while eating cherries with this easy cherry drawing for you and your kids. Try to add cherries to your child’s diet for amazing health benefits.
You can refer to the simple step-by-step drawing guide below
Step 1
First of all, draw the stem of the bunch of cherries. It will provide a baseline for the cherry drawing. You can see from the picture that it is done just by drawing a few lines. These trunks will ensure that the cherry has a good overall position on the drawing. Estimate the length and curve of the branches for perfection.
Step 2
Then draw circles for the cherries, I drew two cherries on a bunch, and you can use as many as you want. Make some lines and bumps on the rind of the cherry to make it look like the actual cherry.
Step 3
Then draw construction lines for the leaves. Try not to draw leaves that are too large and wide. Then draw the leaves in contrast to the size of the cherry. Finish off the leaves by creating some veins and veins on the leaves to make them look real
Step 4
In this step, draw some more leaves on the other side of the stem. Also, provide all the final shades and strokes to turn it into a realistic cherry drawing. Use a drawing marker in this step for a finished look.
Step 5
Finally, it’s time to color the cherries. Try to use shades to make it look realistic. I would suggest you to use red for the rind, green for the leaves, and brown for the cherries easily. Don’t forget to leave a white spot on the skin on the cherry for emphasis. Since cherries have a very smooth surface, try to use a good color brushstroke.


