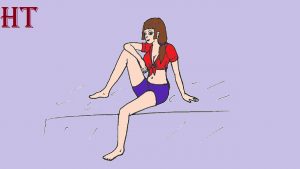
How To Draw Anime Bodies Female easy with this how-to video and step-by-step drawing instructions. Anime drawing for beginners and everyone.

Please see the drawing tutorial in the video below
You can refer to the simple step-by-step drawing guide below
Step 1
When drawing a figure, you should start with the head. So first draw a circle.
Step 2
Add the chin by drawing a triangle-like shape at the bottom of the circle, but with slightly curved lines.
Step 3
Divide the head into 2. The bottom half is where your character’s facial features will be drawn. Next divide the bottom first half by 2.
Step 4
Now you have to divide the bottom 2 halves into 2 equal sized parts. The reason for all the division is to find where to place the eyes, nose, and lips.
Step 5
Draw the eye between the first 2 lines (1 & 2), the nose between the 2 and 3 lines and place the mouth on the last dividing line, aka the 4th line.
Step 6
Now onto the body. The male body can be divided into 8 equal parts about the same size as the head. However, the female body can be divided into 7 and a half parts, the female body is usually smaller and more curved.
Step 7
Create a stick figure using the dividers as a guide. The joints are usually on the guide, except for the shoulder slightly lower and the elbow between lines 2 and 3. Here’s a little guide to the result of every division: 1->chin 2->where the ribs end between 2 and 3 -> elbow & navel just below 3 -> groin and wrist 4-> fingertips 5-> knee 6-> lower half of calf muscle 7-> ankle 7.5 -> plantar foot.
Step 8
Draw the outline of the body by reviewing the instructions. Don’t forget that women have softer, oval bodies while men have trapezoidal, angular bodies.
Step 9
Add hair and you’re done! That’s it! Your female preview is complete!
Step 10
Now, take a side view 3/4 and create a pose. Draw a circle and this time make the chin point to one side: left or right. Try drawing it facing left. You can use a triangle-like shape as a guide.
Step 11
Draw a curved line starting at the top of the head and ending at the chin. These will be guides for the eyes, nose, and mouth and represent the middle of the front view of the head, but viewed in 3/4 mode.
Step 12
Draw a guide line for the eyes by drawing 2 lines and then drawing the corners of the eyes.
Step 13
Draw 2 more guides and add the nose and mouth. The ears will also be drawn using these guide lines because the ears are the same size as the distance between these lines.
Step 14
Next comes the shoulders and torso. Draw these using the lines for the bones and outlines of the shapes and circles for the joints.
Step 15
Same step for the arm. Don’t forget that the forearm and arm are the same size as the head!
Step 16
For the hands, use a trapezoid and a triangle as the base shapes. The palm of the hand is in the shape of a trapezoid, and the thumb and other four fingers are triangular.
Step 17
Follow the same steps for the hips and crotch. Remember that women are wide and curvy in this area!
Step 18
Repeat the same steps for the legs. Observe the ratio! The size of the torso and hips is equal to the area between the knees to the hips.
Step 19
For the foot, use polygons that consider the ankle, heel, and pads of the foot.
Step 20
Next add hair and clothes. Clothing should not stick to the body unless they are too tight. Use the shape of the body to draw them and don’t forget to add the folds! Congratulations! You have completed.


