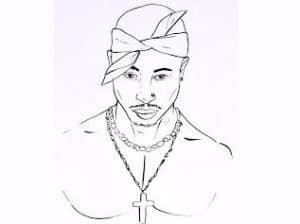
How To Draw Tupac Shakur easy with this how-to video and step-by-step drawing instructions. Celebrity drawings for beginners and All.

Please see the drawing tutorial in the video below
You can refer to the simple step-by-step drawing guide below
Step 1
In the first step of this portrait, you will outline all the lines and shapes. When you’re drawing a portrait, you really have to make sure you’re lightly sketching the lines to make sure it’s easy to erase or even if you make a mistake. You don’t want your drawing to have heavy pencil marks on your sketch. Start by sketching out the shape of the car’s headlight lying on its side for the shape of his face. Sketch according to the facial guidelines to ensure evenness of the eyes, nose and mouth along with the eyebrows. Draw guide lines for his ears and bandana along with his neck.
Step 2
In the next step, you will outline the rest of the bandana tied in the front. The shape looks like a baby carrot. Draw the details inside his right ear and continue with his eye. His right eye has a narrow almond shape and his left eye is much smaller because his face is trying to see you from one side. Draw the shape of his wide-looking nose with a rounded tip. An easy way to draw full lips is to turn your paper over until your face is up and draw a nice long heart. Sketch the mustache in his liner and then move on to the next step.
Step 3
As you can see, this step is where his face starts to appear as if he’s looking right into your soul. First things first. Draw detailed wrinkles and folds on his bandana as shown and then outline the bone structure of his left eyebrow along with his long feminine full lashes. Detail his facial structure until you get the shape of his cheeks and chin. Now outline his bold brow line and eyelids. Next, draw his eyeballs and nostrils in the shape of a teardrop. Start painting his mustache lightly and add lip detail.
Step 4
In this fourth step you will do some light shading. On the right, take your pencil and detail the hanging part of the bandana falling on his face. Now lightly shade on his right cap as shown and then shade or lightly fill his pupil leaving a bit of white behind for the shadow effect. Do the same coloring technique for the left eyeball. A little more detail inside his ears along with some fine lines on his neck.
Step 5
You will spend a lot of time filling and shading in this step. You are creating a shadow effect as you can see. Grab your pencil or shading tool and start with the forehead then paint your way down. But before doing any shading, you will have to erase all the visible and shape guides that you drew in step one. After you do that, continue with your shadows. You want to be leftmost with your shade, you are trying to create a shadow that starts at his forehead and ends on his chest as you can see. Shade in some parts of the inside of his ears.
Step 6
Once you’re done, here’s what your portrait should look like. Of course if you’re using a pencil, you’ll get a slightly different look. I did all my shadows in Photoshop. As you can see he came out looking quite real. All in all, Tupac took me two and a half hours to sketch and shading. Excluding the extra time to make the tutorial take an extra 45 minutes. That should end this tutorial on how to draw Tupac Shakur.


