How to Draw Crossed Arms easy with this how-to video and step-by-step drawing instructions. Easy drawing tutorial for beginners and kids.

Please see the drawing tutorial in the video below
You can refer to the simple step-by-step drawing guide below
Step 1
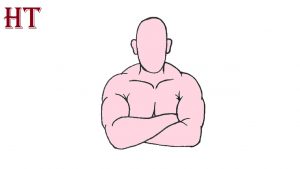
When doing a drawing challenge like this one, it’s important to draw the correct curves of the muscles, so we’ll focus on that in this step of the how to draw tutorial.
Using the reference image we provided to assist you, you can carefully draw a series of curves that join and overlap each other.
They may not look like arms yet, but as we add them in the next few steps, you’ll see how it all comes together to form the diagonal arm!
Step 2 – Draw the first arm
We will draw your arms crossed in this second step. This is another step that will be helpful to keep track of the reference image as you draw.
In the previous step, you drew lines on the outside of the arm, and we are going to start going inward for this step.
You can extend a line from the bottom of the line you drew in the previous step, and the line will be at an acute angle to form the elbow of the left arm.
You can then continue adding more long, curved lines to that elbow and above it to form the left forearm. If it sounds complicated, reference images will help you get it right!
Step 3 – Now draw the arm on the right side
You have already drawn an excellent arm, so now you can draw the right arm! In this step of our tutorial on how to draw diagonal arms, you will repeat what you did in step 2 except mirrored.
The hand on the left arm will go behind the arm on the right. The hand on that arm will then go under the left hand.
Again, that sounds complicated but it’s not too difficult once you follow the steps!
Before moving on to the next step, you can add some lines near the center of the cross arm for the collarbone.
Step 4 – Add Your Drawing Input
Having a pair of arms without a head on top looks a bit unsettling, so to avoid that, we’ll add a head to this part of your arms crossed drawing!
First, you can draw two vertical lines for the neck that the head will be. Then you can draw the head with a rather thin oval. Then you can draw some ears on either side of the head.
We have kept the design of the head quite simple, but you can always make it more attractive if you want!
Crossed arms is still the star of this show, but adding some of your own never hurts.
Step 5 – Now you can add the final details of your arms drawing
This fifth step of our on how to draw crossed arms will help you add some final little details to complete the look of the muscles.
To do this, you will be adding many small curves all over the arm as you can see in our reference image.
Once you’ve added these final details, be sure to add any accents and details of your own that you’d like!
We covered making the face more detailed in the previous step and now you can take it even further by drawing a real face on it. You can even draw your own face on it!
You can even draw other aspects like a shirt on the body or a cool background.
How would you complete this drawing before coloring?
Step 6 – Finish your arms crossed drawing with some color
Now that you have your arms crossed, it’s time to have fun coloring your artwork!
This last step is where you take over and showcase your creativity.
You have many options for how you can color this, and we’ve only shown one of the many possibilities in our reference image.
For an extra personal touch, you can use your favorite art mediums to recreate your own skin tone for this painting!
Or you can take a stylistic approach and use your favorite colors to make this drawing stand out.
Once you’ve chosen the colors you want to use, you can also have fun with your favorite art mediums.
Watercolor paints have a subtle beauty to them and are great for conveying skin tones. For a brighter, more stylish approach, you can also use something like acrylic paint or crayons to create pops of color!
What will you use to bring your drawing to life with color?
Your drawing of crossed arms is done!
With the final details and colors added, you’ve finished the last part of this tutorial on how to draw arms!
We hope that this tutorial made drawing this theme not only much easier, but also fun to do!
Now that you’ve mastered this tutorial, you can go even further with how you personalize drawings.
We’ve covered some ideas like drawing faces or backgrounds, but you can do so much more!
Be sure to check out our website, as we have lots of great drawing tutorials.


