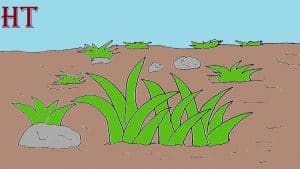
Grass Drawing easy with this how-to video and step-by-step drawing instructions. Easy drawing tutorial for beginners and kids.

Please see the drawing tutorial in the video below
You can refer to the simple step-by-step drawing guide belo
Step 1
Start by drawing a blade of grass. Draw two curved lines, allowing them to meet at a point at the top.
Step 2
Draw more blades of grass. For each, stretch two curved lines, allowing them to meet at a sharp point at the top. Note that the blades of grass overlap, with the lines of the adjacent blades meeting at points on the bottom.
Step 3
Draw more blades of grass, using a set of curved lines for each wing.
Step 4
Continue drawing blades of grass; This time, the grass section will be placed slightly after the first section. Notice how the lines seem to pass behind the previous blades of grass.
Step 5
Draw more grass. Continue using a pair of curves for each blade.
Step 6
Draw another patch of grass in the distance. Instead of drawing individual blades, this time you’ll use a series of short, interconnected curves that meet at jagged points.
Step 7
Draw more grass patches in the distance. Again, join the short, curved lines in a zigzag pattern.
Step 8
Draw a few more blades of grass in the front, using a pair of curved lines for each wing. Give one of your distant plots a foothold by drawing a wavy, curved line below it.
Step 9
Draw curved lines under each patch of grass. Draw a horizon line – the point where the ground meets the sky – using curves of different lengths. Allow some lines to overlap, forming uneven ground, while others may meet in jagged spots, revealing more grass on the horizon. Includes some irregular, round shapes to indicate random rocks.
Step 10
Color your grassy landscape. Don’t forget to fill your pictures with animals like lion, giraffe, zebra, rabbit, etc.


