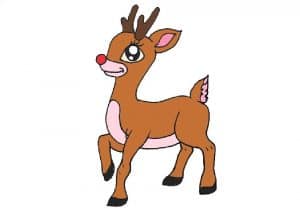
Rudolph Drawing Cute and Easy with this how-to video and step-by-step drawing instructions. Draw so cute for beginners and kids.

Please see the drawing tutorial in the video below
You can refer to the simple step-by-step drawing guide below
Step 1
Start by making a circle for the head, chest, and bottom of the back. Add guides for such faces and legs.
Step 2
Sketch the realistic shape of Rudolf’s face and head like so, and don’t forget to give the bump for the nose and the shape for the ears.
Step 3
Draw a teardrop shape for the eye and color in the pupil. Now make the lining for his mouth, and then finish drawing the nose and detailing the inside of his ears like so. You’ll also draw little stalks for his antlers, and shape his neck, outline his chest, and make lines for his legs.
Step 4
For the final drawing step, all you need to do is finish outlining the legs, hooves, belly, and tail. Erase the lines and shapes that you drew in step one so that your reindeer look perfect in color.
Step 5
Now that you’re done, you can start coloring him. Once the colors are added, you will have yourself a wonderful drawing of the red-nosed reindeer Rudolf.


