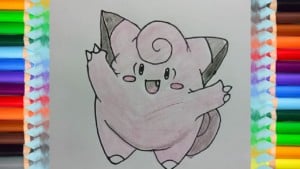
How to draw Clefairy from Pokemon step by step for kids with this how-to video and step-by-step drawing instructions.

Please see the drawing tutorial in the video below
You can refer to the simple step-by-step drawing guide below
Step 1
Definitely, an oval – some triangles for the ears and limbs. Dive right into the drawing now, continue and sketch a simple Clefairy-like face, along with the “whirl” mark on the top of your head.
Step 2
Moving the sides of the whirlpool now – this is Clefairy’s body drawing – starting with pointed triangular ears, followed by a few tiny arms.
Step 3
Draw more claws, and any other details you see fit.
Step 4
Pretty straight forward now – next, continue and outline in Clefairy’s circular body – 5 curves, or yes – another way you can look at it / implement it …
Step 5
OK, so now we’re almost done – let’s continue and sketch some of the final details of our character – lines like the ears, the legs, the tail and yes – Small fairy wings.
Step 6
Less tuning – and this is what Clefairy looks like – just the lines.
Oh, and I actually made a small mistake when the tail met the wing. The wings (or maybe) overlap slightly * instead of * the other way around.
Step 7
Color of course – and yes, with a simple pink panel – it was not too hard at all.


