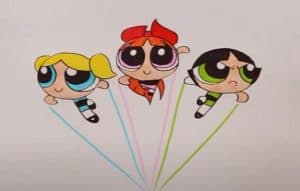
How to draw The Powerpuff Girls easy with this how-to video and step-by-step drawing instructions. Cartoon drawing tutorials for beginners and kids.

Please see the drawing tutorial in the video below
You can refer to the simple step-by-step drawing guide below
Step 1
Okay, let’s start this first step by drawing out three circles for their ends and adding guides on the face. You will then draw their chi lines for their arms and legs and shapes for their feet. Move on to the next step to see what’s next.
Step 2
As you can see, this will be a really easy lesson to complete. You will draw shapes and lines for their eyes and then lining their hairstyles as shown. Once done, you can start shaping their arms and legs.
Step 3
Well, already in step three. I told you this lesson will be easy. All you have to do in this next step is complete the frilly hairstyle then add a smile on each face. You’ll then finish shaping their arms and legs, then add two ears like the shape for Blossom’s bow.
Step 4
Okay, now you’re going to start adding the eyeball lining inside their eyes, one layer for the pupil and one layer for the eye itself. Once done, you can add bangs on Blossom and Buttercup. Draw lines to detail their clothes and shoes and then move on to the next step.
Step 5
What do you think so far? Pretty easy isn’t it? I know. Let’s finish off this final drawing step by adding a liner to their eyes as shown here. You will then start erasing all the guides and shapes that you drew in step one.
Step 6
Once you have shaded in all the black areas, your girls should appear to look like what you see here. All you have to do now is color them with green, pink and blue colors. I hope you enjoyed learning how to draw The Powerpuff Girls step by step.


