How to Draw Sleeping Beauty easy with this how-to video and step-by-step drawing instructions. Cartoon drawings for beginners and kids.
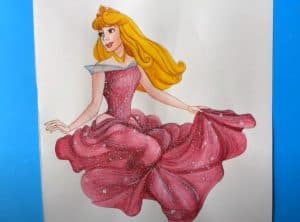
Please see the drawing tutorial in the video below
You can refer to the simple step-by-step drawing guide below
Step 1
You’ll start this easy first step by drawing out the instructions and shapes to form the mannequin frame for your Disney Princess. Start with an oblong shape for her head and then add guide lines on the face. Next, draw the sexy body and lining for the cape and bouncy arms.
Step 2
In this next step, you’ll add curls to her bangs and then shape her forehead and nose. Once you’re done, you’ll draw the shape for her almond-shaped eyes and then her indented skirt neckline. Add some shapes to her arms and then add finger lines. Give her a curvy waist and then some dress lines as shown here.
Step 3
So far this tutorial is pretty simple, isn’t it? What you’ll do next is add more lining to her long blonde hair and then add curls. Shape her collar and then the bottom of her gown. Add some detail around her waist and then thicken the shape of her arms and fingers.
Step 4
Guess what you did? That’s right, you’ve made your final drawing and what you’re going to do now is paint her beautiful eyes and then a fuller lip. Finish her hairstyle and add a tiara, Then outline some details for the upper chest near her neck. Draw detailed vertical lines on the front of her dress and then sew the bottom of her dress as shown. You will then erase all the principles and shapes that you drew in step one.
Step 5
Now once you’re done, your Princess will come out looking like this. All you have to do now is color her. You just learned step by step how to draw Sleeping Beauty, Princess Aurora. I hope you had a blast and stay tuned for other great drawing lessons.
