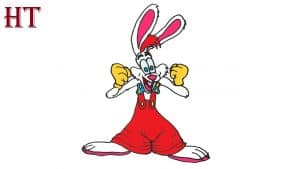
How To Draw Roger Rabbit Easy with this how-to video and step-by-step drawing instructions. Cartoon rabbit drawing for beginners and kids.

Please see the drawing tutorial in the video below
You can refer to the simple step-by-step drawing guide below
Step 1
Are you ready to draw Roger? Good, let’s get started then. The first thing you need to do is create some basic shapes and lines to form the frame for the bunny you are about to draw. Start by making a circle for the head, then draw guide lines for the face, extremities, and torso.
Step 2
Here you will begin to sketch the actual shape of Roger’s facial structure. As you can see, he has high eyes and very prominent cheeks. The chin is also low. Draw some of his shoulders, and then some of his bow ties.
Step 3
Okay, now that you have drawn the face, it is to draw the eye shapes, and then the muzzle or nose for Roger as you see here. Next, draw the arms in full detail, then draw his gloved hand in the form of a fist.
Step 4
Sketch Roger’s long ears then draw and color his bushy eyebrows. Then you would draw crazy looking eyeballs, and then draw a triangular nose. Add the beard, and then draw the shape of his clothes.
Step 5
Roger has a crazy look in this lesson, so to make his look even crazier you have to pull out a few things that help his style. Here’s the weird hair from the middle of his head. Once you’ve finished drawing, you’ll draw the mouth, tongue, and teeth. Add some clothing detail to his crotch, then draw his big bunny paws.
Step 6
For the final drawing step, all you have to do is detail the arms, draw the slings, then detail up to the feet, i.e. the toes. Erase the lines and shapes that you drew in step one.
Step 7
When you’re all done, you’ll have a great drawing like you see here. Now all you have to do is color it. I hope you enjoyed this fun lesson on how to draw Roger Rabbit.


