How To Draw Ninjago easy with this how-to video and step-by-step drawing instructions. Easy drawing tutorial for beginners and kids.

Please see the drawing tutorial in the video below
You can refer to the simple step-by-step drawing guide below
Step 1
As you know, you will draw a Lego person. Start with the head shape and then draw the body. Add a face guide and move along.
Step 2
Sketch the shape of the head or the masked head. This will include the notches on the sides of the face.
Step 3
Next, draw the opening of the mask that covers the entire head, then draw the eyes and eyebrows with such small beads.
Step 4
Next, draw the entire upper body with lots of blocks. This should include both arms and no hands.
Step 5
All you have to really do here is pull out the hand-like clutch and then retract into the sword’s handle. Add some details to the hand guard and such.
Step 6
Next, draw the right hand out, then move on to step seven.
Step 7
As you can see, you will detail the gi that this character is wearing. It’s very simple to draw because all you have to do is make the strip look like the lines on the front of the body like that, and then draw what looks like a torch with a burning flame.
Step 8
Add some light details to the band like lines or stripes and then draw a face over the flame.
Step 9
All you need to do here is draw the block like a belt which is also supposed to be a belt. Add the detail lines and move on to step ten.
Step 10
Clean up the drawing and then draw out the stretched or stretched legs and then add some details to the pants and feet.
Step 11
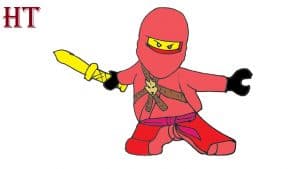
Here it is, your finished drawing of a protagonist from Ninjago. Color in this picture and you are done with this Ninjago drawing tutorial.


