How to Draw Moon Knight with this how-to video and step-by-step drawing instructions. Easy drawing step by step for beginners and everyone.
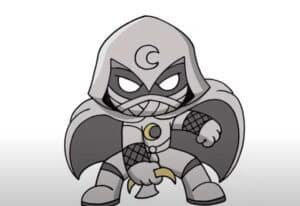
Please see Moon Knight drawing tutorial in the video below
Keep drawing famous characters, and now you will learn how to draw Moon Knight. This is a superhero from Marvel comics. Moon Knight is a mysterious character that has deeply attracted the interest of comic book fans. Moon Knight’s real name is Mark Spector. From childhood, he was interested in boxing and realized his vocation to military service. Mark has dedicated many years to military service in the Marines and the CIA. During this time, he fully mastered martial arts techniques and learned to use a variety of weapons. He has incredible strength, speed, agility, and regeneration. Moon Knight is ruthless to his enemies.
You can see that Moon Knight is wearing a hooded cloak, it is difficult to see the contours of his face. In this tutorial, Moon Knight is presented in chibi style and therefore has all the features characteristic of this style. Moon Knight has a large head, small body and short limbs, but this character is very recognizable. During class, carefully draw all the lines marked in red.
Now you can grab your art supplies and start the lesson, and I wish you creative success!
Moon Knight Drawing Step by Step
Step 1. Draw the head and body.
Draw an even oval and add a small body underneath.
Step 2. Sketch the legs.
Draw lines below the torso and add the legs that are close together.
Step 3. Draw hands.
From the top, draw straight lines and draw the arms to fit the torso.
Step 4. Add the hood.
Using smooth curves, depict the hood with the same shape as in the example.
Step 5. Draw the eyes and the symbol.
Describe two eyes and draw the symbol in the form of a crescent moon on the chest.
Step 6. Add the rest of the cape.
Using a few smooth lines, draw the bottom contour of the cape.
Step 7. Draw the rest of the elements.
Describe the outline of the sleeves and shoes. Draw the buckle belt in a straight line.
Step 8. Correct the inaccuracies.
Correct errors if necessary and remove excess lines in the drawing.
Step 9. Color the drawing.
For coloring, use different shades of gray.
