How to Draw a Tasmanian Tiger with this how-to video and step-by-step drawing instructions. Wild animals drawing step by step for beginners and all.
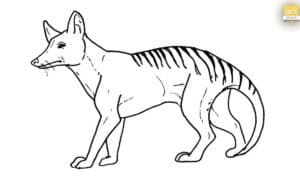
Please see Tasmanian Tiger drawing tutorial in the video below
Tasmanian Tiger Drawing Step by Step
Step 1
You’ll be drawing this animal from the side, so let’s start by creating a few shapes and some guidelines. Start with the head shape, then draw the body and the end. Add a neck guide and then draw the outline shape of the muzzle.
Step 2
You will now begin to sketch the head structure of the Tasmanian wolf. Start with the head, muzzle or muzzle, then draw the lines of the ears and mouth. Notice how the jaw starts to ruffle a bit.
Step 3
On one side of the face, draw the jawline and then start outlining the face and all the details related to the face. Draw the shape of the eye as well as color it. Then you will outline the tip of the nose and then add some details inside the ear.
Step 4
Now that the head and face have been drawn, you will begin to sketch the body. Draw the neck, then the front legs and the feet first. Notice the toes and their curvature.
Step 5
Next, paint the body until you have such a smooth look. The tail resembles a rat’s tail and the chest retracts like a drum. Make the belly and then draw the other front leg.
Step 6
Complete the body of the Tasmanian tiger by drawing the hind legs and then the hind paws. Sketch the detail on the ankle, then outline some light details on the back of the leg.
Step 7
For your final drawing step, all you need to do is draw tiger-like stripes, then sketch out some body details scattered all over the place. Clean up the drawing and you’re done.
Step 8
Okay, here’s your new drawing of the Tasmanian tiger and wolf. Color it and you’re really done.
