How To Draw An Eagle Head easy with this how-to video and step-by-step drawing instructions. Bird drawing tutorial for beginners and everyone.
Please see the drawing tutorial in the video below
You can refer to the simple step-by-step drawing guide below
Step 1
The description we will be doing in this eagle head tutorial will be a close-up of this amazing bird.
For this first part, we’ll start with the outline of the head and beak. First, draw a curved line for the top of the head.
This will connect with more curves for the mine. At the junction between the head and the beak, there will be two small spikes protruding.
For the beak itself, we’ll add some curves to the bottom half of the beak, and this will give it a pointed tip.
That’s all that needs to be done for this step and then we can move on to the next step.
Step 2 – Now draw the bottom half of the mouth
You have drawn the top part of the beak, and in this second part of your eagle head drawing we will add the bottom half along with some details around the mouth area.
Use some curved lines to draw the mouth opening under the beak and add a tongue inside it. Once you’ve drawn the mouth, you can also add the outline of the bottom beak.
Once the beak and mouth are drawn, we’ll add some curves around the mouth area, and then you can use some sharp, jagged lines for the top of the neck.
Step 3 – Draw the eyes and some texture details
Continuing with this tutorial on how to draw an eagle’s head, we will now add eyes and some texture details to this figure.
For the eye, draw a curved horizontal line, then add a circle below it. Then add a dot to this circle for the pupil of the eye.
Next, draw some more curved and pointed lines for the top of the back of the neck. Once this is drawn, we’ll add a lot of texture detail to the feathers covering the top.
Just use lots of curves inside the head area for these texture details, then move on to step 4!
Step 4 – Next, draw pointed feathers at the base of the neck
The next few steps of this eagle head drawing will help you to finalize some details and strokes.
Now we will draw some more bottom of the neck.
This section will be on the left side of the collar, and it will be drawn using some more squiggly lines that culminate in pointed tips.
The size of these spikes would be rather irregular to give the fur an intentionally coarser appearance. Once drawn, we’ll move on to the final details in the next step of the tutorial!
Step 5 – Add the final details to your eagle head drawing
It’s almost time for some coloring in the final step of this eagle head tutorial, but first, we have some smaller details to fill in!
First, we will finish the contour of the neck base, and this can be done using some more curved and pointed lines.
Once this outline is complete, you can add some smaller details to the eyes and mouth to complete those areas.
Once all the details are complete, you’ll be ready for the final step! Before continuing, you can also add some additional details of your own.
One idea is to paint some more of the eagle’s body, but you can also paint part of the background to match this amazing eagle portrait. How would you complete this wonderful picture?
Step 6 – Finish your eagle head painting with color
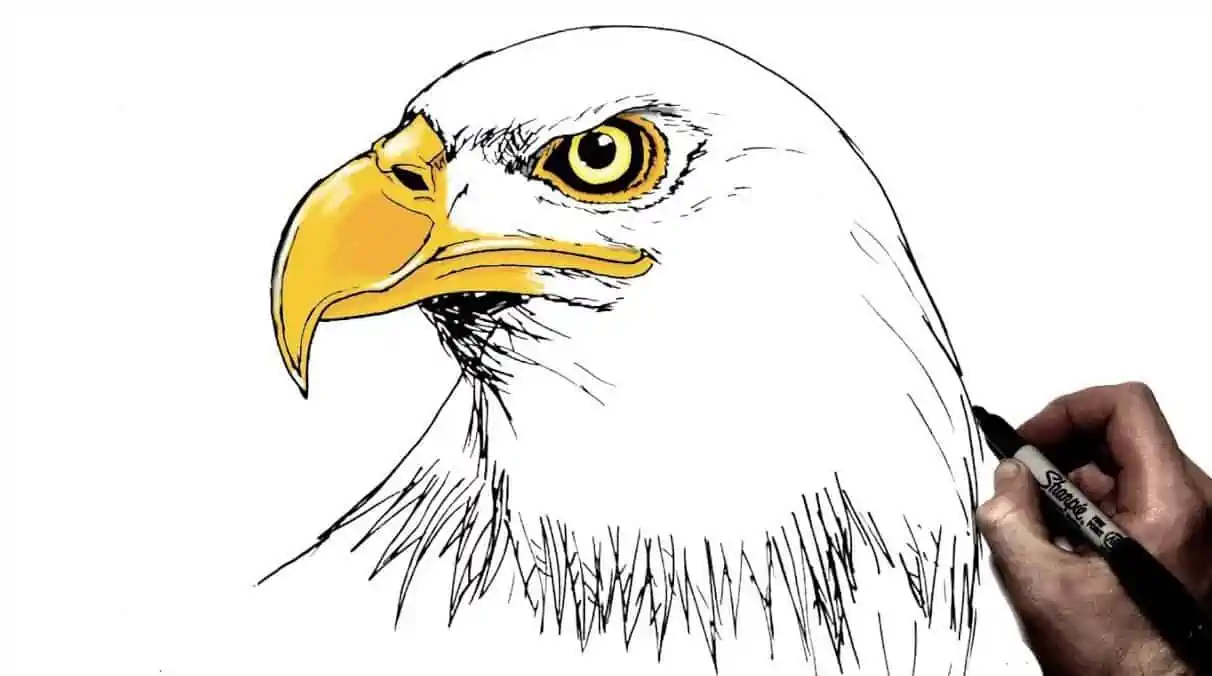
This is the final step of this eagle head painting, and in it we will add some color to complete it.
For the head itself, we used various shades of light gray to give the feathers a more dynamic look. Then we used different shades of gold for the beak to create a bright contrast.
When coloring your own images, be sure to use any other colors you may like!
When adding your colors, you can also have fun with the different art tools and media you use to achieve them. What would you choose to use to complete this image?
Your eagle head drawing is done!
As we mentioned in the introduction to this eagle head tutorial, this bird is possibly the most majestic and revered of them all!
We really tried to do this great justice for birds in this guide, so we hope that these steps make it easy and fun for you!
Now that you’ve finished this tutorial, you can continue the fun with great details and ideas of your own.
We’ve talked about how you can change details, add backgrounds, or play around with art mediums as ways to change things up, but how would you set your own sights on it?
There are also more great drawing tutorials to enjoy on our website! We’ve got plenty of options to choose from with more to come soon, so keep subscribing to catch any new guides.


