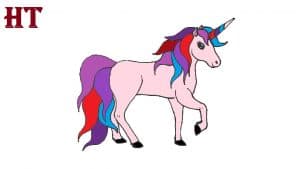
How to draw a Unicorn easy with this how-to video and step-by-step drawing instructions. How to draw step by step for beginners and kids.

Please see the drawing tutorial in the video below
You can refer to the simple step-by-step drawing guide below
Step 1
To start our unicorn we will first need to draw a circle for the head, a large oval for the body and a line connecting the two that will become the necks of the unicorn.
Step 2
Next, draw the nose / mouth of the unicorn and draw another line on each side of the seam to thicken the unicorn’s neck.
Step 3
Now we need to delete our overlapping lines. Also, draw the unicorn’s triangular ears, almond-shaped eyes, and a curve for the unicorn’s nostrils.
Step 4
Next, we need to draw the famous unicorn’s horn lying right between its ears. Also, draw a long mane, which flows down the unicorn’s neck.
Step 5
Now we will draw the unicorn’s legs. You can think of its pins as three circles connected to each other. The largest part of the leg is connected to the unicorn’s body, while the two smaller circles are the unicorn’s knees and hooves.
Step 6
Repeat the same process, now we will use the three-circle method to draw the back leg of the unicorn. The difference here is that we will draw the hind leg slightly bent at the knee, and the circle connecting the hind leg to the body is slightly larger than the front leg.
Step 7
Repeat the last two steps to draw the unicorn’s opposite front and hind legs.
Step 8
In the end, just like we did with the mane, we need to draw the long and flowing tail of the unicorn. It looks like a horse, but exaggerated since this is a mysterious creature after all!
Step 9
A bit of color, and our unicorn is done! I hope you enjoyed learning how to draw a unicorn with me. If you did, be sure to check out the rest of our tutorial. Have fun drawing!


