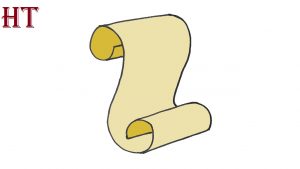
How to Draw a Scroll easy with this how-to video and step-by-step drawing instructions. Easy drawings for beginners and everyone.

Please see the drawing tutorial in the video below
You can refer to the simple step-by-step drawing guide below
Step 1 – Draw the curve of the roll
In this case the scroll will be drawn in 3/4 view. Start by creating a wavy line to show its forward facing edge.
Step 2 – Set width equal to second curve
To set the width of the scroll, draw a second wavy line to show its remaining edge. This section should not go too deep as it will be partially covered by the bottom scroll in later steps.
Step 3 – Draw the curls
Extend the waveline to the matte side of the roll to create curls at each end of it as shown in the example.
Step 4 – Draw the scroll
Draw a pair of rolls (paper / parchment rolled up to look like a cylinder), one on top and one on the bottom. Try and draw these in such a way that the far edge of the roll appears a bit smaller than the front edge.
Step 5 – Finish Line Drawing
To finish drawing the line, first add the top and bottom edges of the roll inside each rolled section. Next, confirm that you’re happy with how everything looks and make any tweaks/changes if necessary. Once you feel satisfied with your drawing, go ahead and mark it back with a black pen or marker. If you don’t happen to have one around, just darken them with a pencil.
Step 6 – Color the Scroll
To color the scroll, make it light yellow. Also, to make the drawing look less flat, you can give it a bit of a shade like in the example.
Slightly darken the areas inside the rolled sections as well as the bottom of these sections as shown.
An easy way to colorize a scroll is to use a pencil, paint, or any method that allows for a fairly light color (the marker can be a bit too bright). You can then add a shadow on top with a light brown, gray, or orange color.


