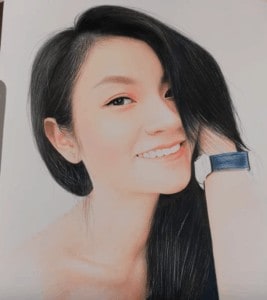
How to draw a portrait step by step. Beautiful girl drawing tutorial by pencil with this how-to video and step-by-step drawing instructions. Pencil drawing tutorial for beginners and everyone.

Please see the drawing tutorial in the video below
Portrait (Girl) Drawing Step by Step
1. Gather Reference Images:
Find reference images of the girl you want to draw. These can be photos of people you know or images from the internet. Having a reference will help you capture the subject’s likeness and features accurately.
2. Basic Head Shape:
Start by lightly sketching the basic shape of the head. This is usually an oval or an egg shape. Ensure that the head is proportionate to the size of the paper and the rest of the features.
3. Facial Guidelines:
Draw a vertical line down the center of the head to help you align the facial features. Then, draw a horizontal line across the middle to mark the eye level.
4. Eyes:
Place the eyes along the horizontal line. Eyes are typically one eye-width apart from each other. Pay attention to the shape of the eyes and the distance between them.
5. Nose and Mouth:
Position the nose below the eyes and the mouth below the nose. Use your reference image to get the correct proportions and shapes of these features.
6. Ears:
Draw the ears on either side of the head, roughly between the eyes and the bottom of the nose.
7. Hair:
Start sketching the girl’s hair. Pay attention to the hairstyle in your reference image. Hair can vary in length, texture, and style, so capture these details as accurately as possible.
8. Face Details:
Add details to the eyes, such as eyelashes, eyebrows, and irises. Refine the shape of the nose, lips, and ears. Make sure to observe the unique features of the girl in your reference.
9. Shading:
Begin shading the portrait to add depth and dimension. Use light and shadow to create the illusion of three-dimensionality. Pay close attention to the lighting in your reference image.
10. Skin Tones:
When shading the skin, use a variety of pencil strokes and different shades of pencil to create a realistic skin tone. Avoid using heavy lines for the skin.
11. Hair Details:
Continue to add details to the hair, such as individual strands and highlights. Hair can be challenging, so take your time.
12. Clothing and Background:
If your reference includes clothing or a background, add these elements carefully, considering their textures and details.
13. Refinements and Corrections:
Continuously compare your drawing to the reference image and make necessary corrections to improve the likeness and accuracy.
14. Final Touches:
Once you’re satisfied with your drawing, erase any unnecessary guidelines and stray marks. Add any final details or highlights.
15. Signature:
Sign your artwork, if desired, in a discreet corner of the drawing.
Remember that drawing portraits takes practice, and it’s okay if your first attempts don’t turn out perfectly. Keep practicing, and over time, you’ll improve your skills and develop your own unique style.


you are the best in drawing
thank you