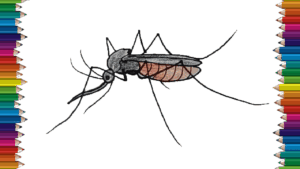
How to draw a Mosquito step by step. Mosquito drawing easy for beginners with this how-to video and step-by-step drawing instructions. Insect drawing easy for kids and everyone.

Please see the drawing tutorial in the video below
You can refer to the simple step-by-step drawing guide below
Step 1
Start with a small oval circle for the belly of the mosquito and then the chest shape. Draw a straight line from the chest and attach it to a small circle for the head. Then you will draw two long legs.
Step 2
You will start sketching the shape of the wrinkled mosquito legs and then the eyeballs.
Step 3
What I want you to do now is start sketching the hairs on the back of your chest. You will also draw other footprints on the opposite side and then draw the top in more detail.
Step 4
Continue to outline the shape of the mosquito foot and then cover it in the eye. Then you will draw the baby taps and then outline the mosquito’s legs.
Step 5
You will draw the rest of the chest and then the hind legs. Don’t forget to add details and definitions because you can see the legs seem to have two separate parts.
Step 6
Okay, did you come closer to the end of this tutorial? Yes, you can start sketching the shape of the wings and then adding details to them. Finish the leg and then belly details.
Step 7
This is your final drawing step and all you have to do is add the last minute details and then start deleting all the instructions and shapes that you drew in step one.
Step 8
This is what your sketches look like when you finish. All you have to do now is color it and you’ve just learned how to draw a mosquito step by step.


