How to draw a leaf on a tree with this how-to video and step-by-step drawing instructions. Easy drawing tutorial for beginners andeveryone.

Please see leaf on a tree drawing tutorial in the video below
I have prepared for you a new drawing lesson in which you can learn how to draw a leaf on a tree. This tutorial is designed specifically for kids and beginner artists, so you can easily complete it.
In this lesson, I will tell and show you how to draw a leaf on a tree. The new knowledge and skills that you will gain by completing this lesson will definitely help you in the future.
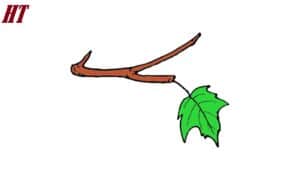
If you want to draw any tree, forest, bush or landscape, then you can easily complete your drawing with this beautiful tree leaf image. In this drawing lesson, you will first draw a branch, then draw a leaf on it.
Leaf on a tree Drawing Step by Step
Step 1. Start drawing branches.
To complete this simple step, you just need to draw a curve.
Step 2. Add the top part of the branch.
Above the previously drawn curve, add a few more lines to describe the branches.
Step 3. Start drawing the sheet.
At the bottom of the branch you drew earlier, draw a single curved line.
Step 4. Add the top of the sheet.
On either side of the previously drawn curve, draw two symmetrical curves.
Step 5. Draw the bottom part of the sheet.
Connect the ends of two previously drawn lines at a point using two curved lines.
Step 6. Outline the veins.
Inside the leaf you drew, add some thin, dashed curves.
Step 7. Color the drawing.
To color the leaves on the tree, you should use green and brown colors.


