How to draw a Horse step by step for kids with this how-to video and step-by-step drawing instructions.
Please see the detailed instructions in the video
You can learn more about simple drawing steps below
Step 1
First, draw two circles in the middle of your paper, which will determine our horse’s body. It will also help to pinpoint the exact location of the horse and neck of the horse. Next, add a circle for the horse’s head as shown here. Make sure your trunk is not too big to be able to add any more details. If you want to draw a Pony, you need to draw the slightly wider ovals. Circles should be applied horizontally to the front legs and chest of the horse.
Step 2
The basic shape of the horse. In the next step, draw the basic shapes of the neck, legs and head. Estimated basic rate. Draw the horse’s neck and add a small circle to the muzzle. Now draw two lines for the front leg and two for the hind leg, with the ball on the joints as shown in the figure. Draw straight lines and short triangles for the ankles and horseshoes.
Step 3
Draw a general outline of the horse. The initial circle will be useful for you in drawing the general shape of the horse.
Step 4
Add a few details to finish painting your horse. Delete the pencil sketch. Now you can add a few details to complete your horse or horse drawing. First, focus on the horse’s muzzle. Start with the eyes. Draw a line vertically, slightly back towards the end. The nose of the horse is simply two small circles. Draw the nails in the shape of a parallelogram. Draw a long and long tent and tail like a horse.
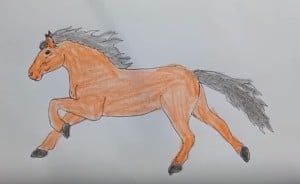
Step 5
Finished drawing horse. Please color the horse


Wow!!