How to Draw a Gopher with this how-to video and step by step drawing instructions. his easy gopher lesson is perfect for fairly beginners looking to learn how to draw.

Please see Gopher drawing tutorial in the video below
You can refer to Gopher simple step by step drawing guide below
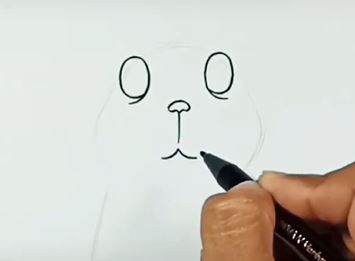
Step 1. Draw the eyes and nose

First, draw the Gopher’s eyes by drawing two circles. Now, create a semicircle to form the nose.
Step 2. Draw the muzzle
Next draw an inverted V shape to create the gopher’s snout.
Step 3. Draw the front teeth

Use a pencil to draw the gopher’s front teeth by drawing two rectangles.
Step 4. Draw the ears and eunuch the head

Attach the gopher’s ears by making a V-shaped line on either side of its head. Then, draw a curved line to form the ear flap. Complete the head by drawing 2 curved lines for the cheeks and the fur on the top of the head.
Step 5. Sketch the body

Outline the body (abdomen) of the gopher by drawing two lines similar to the illustration.
Step 6. Attach the forelimbs

To draw a gopher’s forelimbs, first draw two long lines. Then, attach the zigzag pattern at the bottom to form the claw.
Step 7. Draw a hole in the ground

Draw a hole in the ground by forming a horizontal shape as shown. Next, draw some grass growing around the hole by creating pointed shapes.
Step 8. Add beard

Finally, the lips on the side of the gopher’s nose draw 3 to 4 whiskers.
Step 9. Complete the Gopher drawing
Bring your gopher drawing to life by adding a little color! First, color the muzzle and belly with a yellow pen. Use a brown pencil to color the nose. Next, fill in the front teeth with a white pencil. Now, shade the eyes with a black pencil and add some shadow to the eyes with a white pencil. Don’t forget to color the inside of the ear with a pink pen. Then, use an orange pen to shade the rest of the kangaroo’s body. Finally, color the hole in the ground with a brown pencil and the grass with a green pencil.