How to Draw A Four-Leaf Clover easy with this how-to video and step-by-step drawing instructions. Easy drawing tutorial for beginners and kids.

Please see the drawing tutorial in the video below
You can refer to the simple step-by-step drawing guide below
Step 1
When we start this tutorial on how to draw a four leaf clover, we’ll start with something with a name: the leaf!
As you can imagine, there will be four of these that look exactly the same, but we’ll tackle them separately as each is at a separate, potentially more difficult angle.
Each leaf will be heart-shaped and the first will have the curved side on the upper left side of the clover.
The cards will all meet at a midpoint, so you may want to draw a dot with a pencil to make sure they all start in the right spot. Once you’ve drawn this first leaf, we’ll start adding more!
Step 2 – Draw the second leaf
As we mentioned in the previous step of your four-leaf clover drawing, technically all the leaves should be exactly the same.
However, getting them to look that way from different angles can be very difficult! For this next leaf, it will be towards the bottom left of the clover.
Step 3 – Now draw the third leaf in your four leaf clover drawing
You are starting to understand it now! As you can imagine, we will be drawing the third leaf in this step of the four leaf clover tutorial.
This one will start at the same point as the previous two did. This will point to the top right of the clover, as you can see in the reference image.
In the next step, we’ll add the final clover, so keep it up!
Step 4 – Next, draw the last leaf of the clover
The last leaf in this four-leaf clover will be no problem for you! This will point to the bottom right of the clover and will start at the center point as usual.
Once all four leaves have been drawn, you can erase the pencil dot in the middle if you drew a leaf for you.
Step 5 – Now, draw the stem of the clover
If you’ve drawn enough clover leaves, you’re in luck as we’ll be moving on to new aspects in this step of our how to draw four leaf clover tutorial.
For this part, we will focus on the stem of the clover.
This will start at the center of the clover and then extend down. It will be very thin near the top and then thicken as it goes down.
It will then have a slightly rounded tip at the bottom to complete the stem.
This part isn’t too difficult, but it can take some steadiness, so don’t be afraid to take it easy and slow!
Step 6 – Draw the final details and sub-elements
Before completing the final step, you can add any final details to your four-leaf clover drawing.
For our tutorial, we drew a line in the center of each leaf to complete it nicely. Once you’ve drawn those, you’re ready to move on!
Before you go, though, remember to add any final details you want to your drawing!
Some ideas you can consider is drawing a nice background for the clover. Maybe you can use what you learned in this tutorial to draw some clover behind it!
Another idea you could try is to draw a small insect on it, perhaps a ladybug?
These are just a few ideas you can do, but what else can you think of for your four-leaf clover?
Step 7 – Finish your clover drawing with some color
You’ve reached the final step of this four-leaf clover tutorial! For this step you can relax and use interesting colors for your painting.
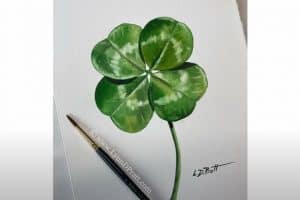
A four-leaf clover is green, so that would be the obvious choice! However, even if you use this color for your clover, there are ways you can inject more color into it!
If you have painted any more details like insects or fun background then you can use some vibrant colors for those details.
You can also go the other way and use some vibrant colors for a more stylish four-leaf clover!
Whatever you choose to do, you can have some variation with the art media you use!
Something like watercolor paint looks lovely against a natural setting like this, but whatever you choose will look amazing! How would you end this picture?


