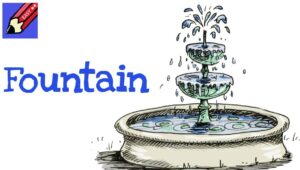
How to Draw a Fountain with this how-to video and step-by-step drawing instructions. Learn to draw for beginners and everyone.
Please see Fountain drawing tutorial in the video below
I have prepared for you a great drawing lesson in which I will tell and show you how to draw a fountain step by step. Any novice artist or child can easily cope with the implementation of this lesson, as this tutorial does not contain any elements that are difficult to complete.
Each of you must have seen many different fountains. A fountain is a structure that serves as a base or frame for water jets to pulsate up or down. Originally, fountains were built primarily to provide drinking water. However, over time, these structures began to be used as an ornament, architectural object or attraction.
This drawing lesson will be useful to each of you because by the time you complete it, you will be able to practice drawing different geometric shapes, such as arcs and ovals. To make this drawing nice and neat, you must be able to draw smooth lines. I think you can’t wait to start this great drawing lesson, so I recommend you get your art supplies ready now, then carefully follow this tutorial and enjoy the drawing process.
Fountain Drawing step by step
Step 1
You will draw the rings for the fountain first, and then draw the connecting faces that will form the fountain’s structure.
Step 2
Using the instructions you’ve made, start drawing the fountains starting at the vertices. Work your way up by drawing the middle sections of the fountain, which is also the foundation of the structure. From the center draw two more such fountain bowls. The last one will be more expansive and larger.
Step 3
Finish drawing the ring for the last floor, then paint the base of the fountain like that. I chose to use the bubble effect, but you can create any style you like.
Step 4
Now that the structure has been drawn, you can begin to drain the water that is pouring in from the top and shrink down to the other floors as they are also filled with water.
Step 5
Finally, paint your beautiful stone carving on the fountain. You can adjust the templates that you see the fountain page, or you can leave everything as it is. You will also need to draw some wave cuts in the water that fill the final floors. Erase the mistakes, then you’re done.
Step 6
That’s it, you have completed this fountain drawing. If you want to color or paint a beautiful park background, you can do that too.


