Hello everyone and welcome to the drawing lesson of the Drawing For All group. Today we decided that it is worth doing a simple drawing lesson on an object that is familiar to all inhabitants of planet Earth. So, let’s start the lesson on how to draw a barrel.
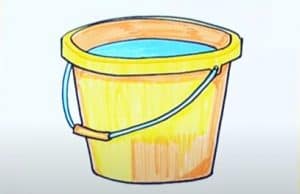
Please see the drawing tutorial in the video below
You can refer to the simple step-by-step drawing guide below
Step 1
We want our bucket drawing to be smooth and symmetrical. To do this, we draw a vertical line.
Step 2
In the upper part of the line from the previous step, we draw an oval.
Step 3
Use two straight lines to draw the side edges of the bucket. Use a slightly curved line to draw the bottom part.
Step 4
Here we just need to take an eraser and erase the line that we drew in the first step, which is no longer needed.
Step 5
In the upper part, we draw the jaws and draw a bucket handle with a pair of long curved lines.
Step 6
Draw a clamp like in our example. Using a straight line, draw a seam (this only appears on metal buckets).
Step 7
Again we pick up the eraser to erase all the extra lines.
Step 8
Now with the help of clear strokes we draw the glare. Use dense shadows to paint.
It was an article in which we showed how to draw a barrel. We think that even someone who holds a pencil for the first time can cope with this lesson. If you have any problems with this guide, let us know about it in the comments section of this article. But even if you can’t do everything like in our example, don’t fret. The best teacher for any artist is practice. Only practice can teach you to draw like a true professional artist, we can only help you improve your skills.
