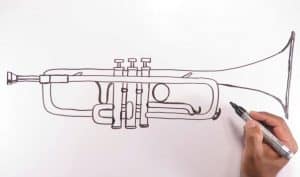
How to Draw a Trumpet Easy with this how-to video and step-by-step drawing instructions. Easy drawing tutorial for beginners and kids.

Please see the drawing tutorial in the video below
You can refer to the simple step-by-step drawing guide below
Step 1
First, sketch the outline of the trumpet. At this stage, the trumpet drawing consists of three basic geometric shapes. We have to use very light lines in this step.
Step 2
Now outline the outlines of the tube, mouthpiece, valve, and stopper. All these details should also be done using the brightest, almost transparent lines.
Step 3
Now with the help of clear and dark lines will draw out the tubes in detail like in our example. With the help of an eraser, erase unnecessary auxiliary lines from the area that you have traced.
Step 4
Carefully draw out the remaining bell, tubes and buttons as in our example. Now erase all the remaining auxiliary lines that we drew in the first two steps.
Step 5
And the last step of the lesson how to draw the trumpet. Here we need to add shadows and glare.
In this post, there are a lot of details, and you have to work very hard. This guide requires diligence and attention. But if you are not afraid of these difficulties, you can learn to draw the trumpet as well as we do. And as always, a few tips at the end of the lesson. To learn better how to draw a trumpet (and anything like that), put it in front of you or find a picture and try to draw it from different sides. To simulate metal texture, draw glare using lines that repeat the contours and bends of the item.


