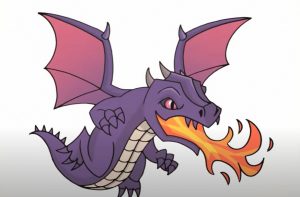
How to Draw a Fire Breathing Dragon easy with this how-to video and step-by-step drawing instructions. Dragon drawing tutorial for beginners and kids.

Please see the drawing tutorial in the video below
You can refer to the simple step-by-step drawing guide below
Step 1
The most important thing when drawing a fire-breathing dragon is that you pay attention to the shape of the mouth. The closed mouth has the lower jaw tucked under the upper jaw, like that of a dinosaur. You’d better place your dragons based on similar animals from the past, dinosaurs. With the dragon’s mouth open, drawing the lower jaw can be more complicated. You should note the gap between the bottom and the top, making sure the top is still slightly longer than the bottom. Also, look at the snout tension, with the lines defining the rough skins pointing upwards, like a dog’s muzzle.
Step 2
Now, let’s dig deeper into dragon anatomy, because essentially, self-studying about the anatomy will help you continue your success in drawing dragons. If you don’t know anything about anatomy, creating shapes outside of the body can be confusing. I like to add some kind of realism to my creatures, mainly because it helps the viewer to relate to them. Here, I have created an anatomy to support a dragon’s ‘fire system’. What you see below the nasal cavity and mouth, is a ‘pocket of fire’. This provides the movement of liquids similar to gasoline, across the hidden membrane between the throat and tongue. The pocket of fire is filled with liquid from a cavity next to the stomach, which then secretes from the middle of the throat and explodes to the outside as a fire. Ignition of a fire extinguishing liquid, which is a heated spark occurring at the back of the throat, ignites into a fire.
Step 3
This is what the inside of the anatomy looks like, when no fire sac is filled. Notice how the flushed neck contrasts with the puffy neck. See how adding a little realism to your creatures creates excitement?
Step 4
Now, let’s examine the teeth of our reptiles. What most artists don’t understand is that, when a dragon is opening its mouth in insult, its teeth will become bare, just like modern-day animals. Just refer to a wolf, cat, ferret or bear, observing how their snout becomes thickened with flesh above the nose. So what we’re going to do here, is when we draw the tooth, make the gums visible so it looks pleasantly ugly. What is a dragon without a fierce roar or growl?
Step 5
Sometimes, I see artists drawing fire-breathing dragons with inaccurate details. When breathing out fire, the tongue should either stand to one side or hide from the escaping flame. Otherwise, their tongues will be scorched by direct contact with fire. These are two of the many ways to pull the tongues of your dragons as they chase fire. See how realistic they look? Now let’s switch to the gray shape, and see how the tongue remains in the path of the fiery passage. That’s not what we wanted…
Step 6
Now, let’s look at the different types of fire. The one above is a mixture of acid and fire, quite… deadly. The second is a very large spark, covering a wider explosion radius, but a shorter distance. The third, covers a longer distance, but the blast radius is shorter. It is important to draw/stylize fire like modern weapons (pistols, rifles, flamethrowers, etc.). Try to incorporate realism into fantasy! Adding unique variety in your art is important to stand out.
Step 7
These are just different ways to draw your dragons breathing fire. I have included a flying dragon, child and curved bottom. It’s best to do a quick sketch of the pose before starting to carve out the details of the head first (most people do this :P). Take your time and have confidence. If you need to, go ahead and refer to other bat/dinosaur artists or references.
Step 8
Let’s start this tutorial with a composition lesson just for the side view of the dragon’s head that you will be drawing. Both sides start the same until the third step. When you get to the third step, the dragon’s mouth will be closed in one and opened in the other. You’ll also draw teeth, and the tongue on the dragon’s head is on the left, and just the teeth on the dragon on the right. Alternatively, draw the horns tilted back, then draw the shapes of the neck.
Step 9
Now let’s start the lesson for the entire dragon you see in the thumbnail. Start with creating the basic shapes for the head and body. Draw in the neck and extremities like that, then add a guide line on the face.
Step 10
Next, start sketching the dragon’s head. For me, I started with the horns, then I worked on the forehead, the muzzle, then the left side of the jawline. Also, draw the tongue to look limp and make sure that the lining for the mouth is firm.
Step 11
Using the thin line weight, draw in the interior details to form the facial sections and the frill’s starting spikes. I like to use thick outlines for the base body and smaller lines for the moderate details inside.
Step 12
Now that you have drawn the face, you can start sketching or drawing the body. Start by sketching the long neck, then draw the back and shoulders. Next, create the front leg first, then add some details to the body like the crease under the arms and so on.
Step 13
Then work on the back body, as well as the tail. The tail should have boxy curves to match this dragon’s stylistic theme. Using lots of sharp edges adds a sinister feel to the artwork. Take your time and start with the hind legs first, then the tail.
Step 14
You will stay motivated with drawing the body of the dragon. Here you will work on the remaining limbs. Draw the other front and hind legs like this, then outline the powerful claws on each of the front and hind legs. They are also known as claws. Sketch some more muscular upper body like this, then move on to step fifteen.
Step 15
I know this step seems difficult, but if you take it one step at a time, it’s not. Let’s start on the left wing, as this is probably the most difficult wing to handle. I ALWAYS start my wings with forearms and then claws, then form the fingers on the wings in order. So basically, I work from the inside out when drawing the wings. Once you’re done, work on the right wing.
Step 16
Draw in a long line the sharp frills that flow down the dragon’s neck and back like so, then outline the wing detail to add texture and stroke. You’re almost done with your dragon, just a few more steps to go.
Step 17
Now you’ll need to draw on the rough rock or rock the dragon is standing on as it looks down at an enemy or prey. Sketch a rock or rock with such a rough pattern, then draw details for the rock. You will end up with a strong looking rock like the one you see here. Take your time so it appears great looking.
Step 18
For the final drawing step, all you have to do is draw the line of fire rising from your dragon’s mouth. Instead of a straight line edge liner, you’ll draw in a zigzag style instead. Once you’re done with the fire, start erasing your mistakes.
Step 19
This is what your dragon appears when you finish. You can now have an explosion when you color in your work. Good job guys, remember to upload what you did so I can check.


