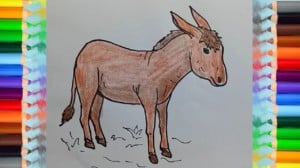
How to Draw a Donkey step by step easy for kids with this how-to video and step-by-step drawing instructions. Easy animals to draw for children and everyone.

Please see the drawing tutorial in the video below
You can refer to the simple step-by-step drawing guide below
Step 1
Let’s draw a donkey! Trace a line across your page for the back.
Step 2
Now, trace a line going down to draw the tail. This tail is a little square at the end, so make corners before tracing your line back up again.
Step 3
To draw the first hind leg, make sure the top half of the leg is a little more curvy than the bottom half of the leg.
Step 4
Trace a line going back across the page to draw the belly.
Step 5
Draw the second hind leg by tracing alongside the first one. Here’s a tip: trace a line across the bottom of each leg to give your donkey paws.
Step 6
Now, draw the first front leg, making sure that your lines are a little uneven. They don’t have to be straight!
Step 7
Trace uneven lines for the second front leg alongside the first. Don’t forget those paws!
Step 8
From there, trace a curbed line up for the neck.
Step 9
Last, trace a long oval shape for the head. Add a line for the mouth and a small oval for the eye. Make upside-down letter Vs for the ears, and give the donkey hair by tracing thin circles down the back of its neck.
Step 10
Finish your donkey by coloring, so color it brown or gray.


