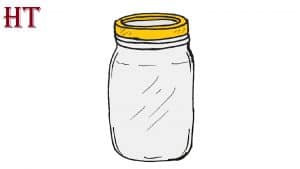
How to Draw a Jar easy with this how-to video and step-by-step drawing instructions. Easy drawing tutorials for beginners and everyone.

Please see the drawing tutorial in the video below
You can refer to the simple step-by-step drawing guide below
Step 1
We want our drawing to be as symmetrical and smooth as possible, so let’s draw a vertical line.
Step 2
Now let’s draw a cylinder, as shown in our example (by the way, you can learn how to draw a cylinder with the help of our tutorial on a puck).
Step 3
A little higher draw another cylinder, but a little narrower. Next, draw the bottom of our jar, like in our example.
Step 4
We move to the top of the jar and draw the contours of the lid with the help of another flat cylinder.
Step 5
Using clear and dark lines carefully draw the body of the jar. Remove all unnecessary rules.
Step 6
Also using clear and dark lines to draw the contours of our jar lid.
Step 7
Now let’s add some glare and shadows to our jar artboard using fill color.
Today we have shown you how to draw a jar step by step. This lesson is quite detailed, and chances are that each of you will be able to cope with it.
But we want to pay attention to some features:
– To make all the errors more noticeable, just bring your drawing to the mirror.
– To make the glass more realistic, repeat the contours of the jar using light, broken lines.


