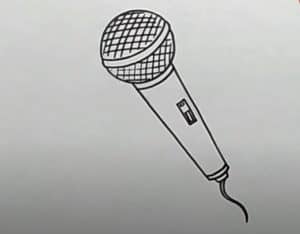
How to draw a microphone easy with this how-to video and step-by-step drawing instructions. Easy drawing tutorial for beginners and everyone.

Please see the drawing tutorial in the video below
You can refer to the simple step-by-step drawing guide below
Step 1
Any drawing starts with simple details, and our microphone drawings are no exception. Outline the microphone work surface in a simple circular shape and the handle in a long, slightly tapered rectangle. This is a fairly standard shape, characteristic of most microphones.
Step 2
The extremely simple step of this lesson on how to draw a microphone. Here you just need to delete an unnecessary line in the upper part and draw some short lines as shown in the image below. By the way, you can also add a few buttons, lights and switches.
Step 3
Not very difficult, but quite difficult step by step. We start it off by drawing a strip in the middle of the microphone’s circular work surface. Next, draw texture with simple junction lines. You can make the baking texture bigger or smaller.
Step 4
In order for our microphone drawing to look more realistic, volumetric, and natural, we need to paint the shadow. If we are assuming that the light is falling from above, then we need to paint the shadow on the underside of the microphone. The shadows in such a drawing are not difficult to do, you just need to apply the same dense and uniform expansion as shown in our mic drawing below.
In this lesson on how to draw this microphone, we wanted to keep it simple, and we think we did. As we said in our other lessons, such drawings are very important, because with their help you learn to draw simple objects, which will increase the level of success. master your drawings. To keep your level of drawing skills growing, subscribe to us on social media and visit us as often as possible, as we release new drawing lessons almost every day.


