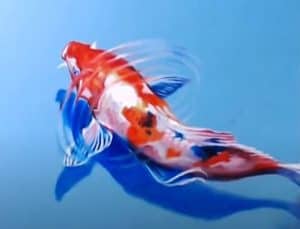
How to draw a realistic koi fish with this how-to video and step-by-step drawing instructions. How to draw a fish for beginners and everyone.

Please see the drawing tutorial in the video below
You can refer to the simple step-by-step drawing guide below
Part 1
If you want to draw correctly, you need to make a sketch of a koi fish. Including the following steps:
Step 1
To start our koi fish, we will first need to draw a simple curve. This line will determine the basic shape and position of the fish’s body.
Step 2
Next, draw the outline of the koi fish body. The body should follow the general direction of the curve from the last step. Also, make sure the front of the koi is slightly fatter and rounder than the back.
Step 3
Now that we have the basic shape of the body down, we can delete the curved guide. Also, draw the big mouth of the koi with some small whiskers on either side of the head.
Step 4
Next, draw an outline of the koi gill. This line will extend about 1/4 the length of the fish’s body.
Step 5
Draw the koi Fish are large oval ovals, and also give the koi two small round nostrils located on top of its head.
Step 6
Koi are famous for their beautiful fins. Draw two large fins starting from the gills, extending gently behind the fish.
Step 7
Next, draw two more fins near the back of the koi. Draw these fins a little smaller than the previous fins of the koi.
Step 8
Now that most of the koi fins have been made, we will need to draw a long fin located on the top of the Fish body. In addition, draw the large tail of the Koi, divided into two parts as shown in the picture.
Step 9
Koi fishes have some very beautiful patterns and colors. Draw the outline of your koi color pattern using a jagged line running down the body. Be sure to keep this line uneven and blurry to make the koi fish model look natural.
Part 2
Finally switch to the coloring for your koi. Koi have tons of color variations, but the most common is a white base with a yellow or red splint. But you can be creative here and do whatever you want. How to color see more instructions in the video above.


