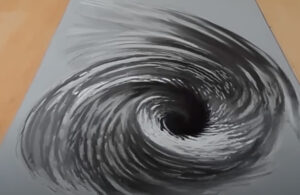
How to Draw a Black Hole with this how-to video and step-by-step drawing instructions. Easy drawing tutorial for beginners and all.

Please see the drawing tutorial in the video below
You can refer to the simple step-by-step drawing guide below
Step 1. Sketch the black hole
Sketch the oval center of the black hole.
Step 2. Draw the event horizon
Drawing the event horizon at the center of the black hole symbolizes the point of no return.
Step 3. Sketch the accretion disk
Form an accretion disk by drawing long curved lines around the center of the black hole.
Step 4. Emphasize the shape of the accretion disk
Emphasize the spiral shape of the accretion disk by adding shorter curved lines.
Step 5. Outline the scraps
Sketch the debris pulled into the black hole by drawing small ovals.
Step 6. Complete the black hole drawing
Let’s fill the black hole with some color! First, color the center of the black hole with a black pencil. Next, color the accretion disk yellow, orange, blue, and purple. Now, color the scraps with a light gray pencil. Then, cover the background with a dark purple pencil.


