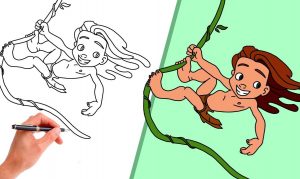
How To Draw Tarzan easy with this how-to video and step-by-step drawing instructions. Easy drawing tutorial for beginners and kids.

Please see the drawing tutorial in the video below
You can refer to the simple step-by-step drawing guide below
Step 1
This will be a long first step. You will start by drawing the shape of the head as a small circle and then add guide lines on the face. Next, draw another circle for his chest and then add shoulder and arm guides as seen here. Then you will add lining to his waist and then leg and foot shapes. And this step curls two lines for my hair.
Step 2
Now you will add his fingers on his hand and then make the lining for his pectoral muscles. Add the small shape of the eyes and then the shape of the eyebrows and the narrow jaw. Draw more lines for his hair and then add a long line for the vine he is swinging on. View his leg details by adding some muscle definition then proceed to the next step.
Step 3
Now you will start this step by adding a definition of his chest like his collarbone and then a definition of his neck. Draw some nipples and then his abs. Add more fingers and draw the left leg and foot. you will finish this step by adding some toe lines on his right foot and then detailing his shin.
Step 4
You have now reached the fourth step and you will begin this step by finishing the hair that is supposed to look like a shaggy hairstyle. Then give him some eyeballs and pupils. This is followed by a narrow pointed nose and flared nostrils, then a small dash for the mouth. You will then thicken his vine and finish off his legs and toes.
Step 5
In this final drawing step, you will detail the vine and then his hair. Define his eyes and add his loincloth. Start erasing all the principles and shapes that you drew in step one.
Step 6
This is what your Tarzan will look like when you’re done. All you have to do is color him. I hope you enjoyed this step by step how to draw Tarzan tutorial. I’ll be back with more to stick around clowns!


