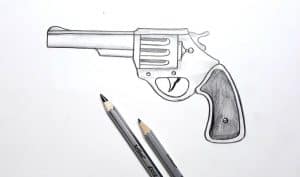
How To Draw A Revolver Gun easy with this how-to video and step-by-step drawing instructions. Pencil drawing tutorials for beginners and All.

Please see the drawing tutorial in the video below
You can refer to the simple step-by-step drawing guide below
Step 1
Let’s start by drawing the front part of the muzzle and then draw the barrel, top strap and some frames.
Step 2
Next, we’ll draw the outline to form the crank and the barrel where the actual bullets reside. All will be detailed in the following steps.
Step 3
Next, draw the handle or grip. For this particular revolver, the grip looks pretty compact.
Step 4
As you can see, you will draw the hollow part of the gun which also houses the trigger.
Step 5
Simply draw the cylinder for the barrel, then move on to step six.
Step 6
Add the indent to the cylinder, then you can move it again to step seven.
Step 7
Add another definition to the revolver’s frame, then draw the hammer on top of the frame’s notched shape.
Step 8
You will finish everything by sketching the details for the hilt. In this case, the grip will be a rubber grip like some Taurus models. Erase the mistakes and you’re done.
Step 9
That’s it, that’s all it takes to draw a revolver. I hope you have fun people, see you soon.


