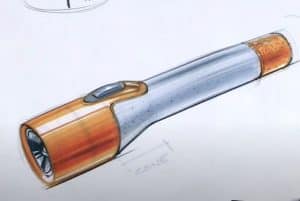
How to Draw a Flashlight easy with this how-to video and step-by-step drawing instructions. Pencil drawing tutorials for beginners and everyone.

Please see the drawing tutorial in the video below
You can refer to the simple step-by-step drawing guide below
Step 1
First draw the basic shapes of the flashlight, which are the main outlines and outlines of the flashlight body. It consists of two cylinders – one is thin and long, and the second is short and flat.
Step 2
Sketch out the basic details – the button at the top, a small bulge on the top of the handle (another cylinder, actually) and a light bulb.
Step 3
Now, using the oval draw the front part of the flashlight. Draw a line on the “tail” of the flashlight.
Step 4
Remove all unnecessary rules. Darken and smooth the lines.
Step 5
And we have come to the last step of the step by step tutorial on how to draw a flashlight. Add lines on the handle of the flashlight. Use slashes to add textures to handles. Start adding shadows. The light comes from above, so we need to add shadows to the lower part of the flashlight. Use long dashes to draw the shadows. Draw layers of shadows by miscellaneous pressing on the pencil.
It’s a lesson on how to draw a flashlight step by step. If you want to try drawing something more complicated, visit our drawing lessons on how to draw a samurai and how to draw Wolverine original. Stay tuned and wait for new drawing lessons. Bye!


