How To Draw Lilo And Stitch easy with this how-to video and step-by-step drawing instructions. Cartoon drawing tutorials for beginners and kids.
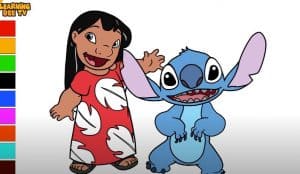
Please see the drawing tutorial in the video below
You can refer to the simple step-by-step drawing guide below
Step 1
In the first step of the tutorial on how to draw Lilo And Stitch, we will start with Lilo’s head.
To start with her head, you may find it easier if you draw a circle with a pencil to give a rough outline of her head.
Then use two small dots and some simple lines for her nose. Her eyes are quite far apart on the face and will be drawn with some round shape with pointed ends on the sides and large pupils.
You can then draw her open mouth and tongue as they appear in the picture to give her a pretty smile!
You can then contour her face and then style her hair with some more curves for the sides of her hair to fall behind her shoulders.
Finally, use a row of circles on top of her head for the flowers she is wearing in her hair. Then we can move on to step 2!
Step 2 – Next, draw the rest of Lilo’s body in this section
With her head drawn, we can now draw the rest of Lilo’s body for this part of your Lilo And Stitch drawing.
There will be a lot of elements that we will draw in this step, so remember to take it slow and stick to the reference image. Lilo will be hula dancing in this picture, and we will start by drawing her arm.
Lilo has a very short, almost non-existent neck, so her arms will run across her neck. They will be drawn with some curves and have some leaves as bracelets around her wrist.
You can then use some more rounded lines for her top and belly before drawing her grass skirt.
Then draw her legs underneath the skirt to finish this step. Once you’ve copied the reference image, we can continue.
Step 3 – Draw the Beginning of Stitch’s Head
Now that you’ve drawn Lilo, we can draw her alien friend Stitch in this step of the Lilo And Stitch tutorial.
Like we did with Lilo, we’ll start with his head. His eyes are black, large, round with some outline around them. We’ll only see a little of his right eye, and his nose will be round between his eyes.
Its mouth is wide, round and almost shark-like with rows of sharp teeth, then you can use some rounded lines for its large ears and complete the outline of its head. Then you can also add some rows of leaves on top of his head.
Step 4 – Now draw some arms for Stitch
Stitch is hula hopping just like Lilo, so we’ll start drawing his dancing body in this part of your Lilo And Stitch drawing.
His arms will be posed very similarly to Lilo’s, with the main details being that his arms are thicker and rounder and he has small small hands with some claws at their ends.
Once you’ve drawn his dancing arms, you’re ready to draw some final details and elements in the next step!
Step 5 – Next, draw the final details for Lilo And Stitch
In this fifth step of the Lilo And Stitch tutorial, we’ll be finishing the bottom half of Stitch.
You could draw another leaf skirt like Lilo’s, and then finish off by drawing his feet sticking out underneath them.
Once you have drawn this part of his body, you have completed all the drawings for this picture!
You can also maintain the fun by adding some of your own details and elements to personalize the photo.
Some ideas you can apply are to paint the background for a picture inspired by the movie, or you can even draw some more favorite characters from the series!
These are just a few ideas, but there are countless ways you can show off your drawings yourself.
Step 6 – Finish Your Lilo And Stitch Drawing With Some Color
We will finish this Lilo And Stitch drawing by adding some amazing colors to it. In our reference image, we used green for the grass skirt and crown, while using blue for Stitch’s fur.
You can use this as a reference point if you want the colors to be accurate to the ones in the movie, but make sure to use whatever color you want for it!
You can get different color variations by experimenting with different art media and tools.
